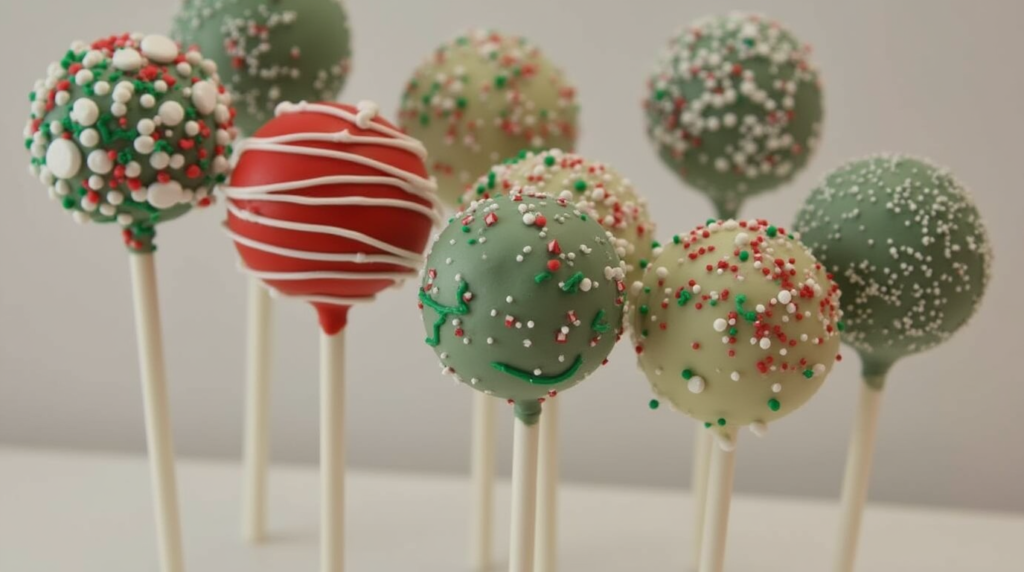
Step-by-Step Guide: How to Make Starbucks Cake Pops
Table of Contents
How to Make Starbucks Cake Pops ?
There’s something magical about Starbucks cake pops. These little treats are an explosion of flavor and sweetness, wrapped in a colorful coating and a delightful bite-sized form. If you’ve ever found yourself craving them between sips of your favorite coffee, you’re not alone. But why settle for just purchasing them when you can create your own delicious Starbucks-inspired cake pops at home? In this guide, you’ll discover a step-by-step process to make these indulgent treats from scratch. Whether you’re a seasoned baker or a beginner, this guide will give you everything you need to recreate the Starbucks experience in your kitchen.
What Are Starbucks Cake Pops?
Starbucks cake pops have taken the world by storm. These bite-sized delights are made by combining moist cake with a creamy frosting, shaping the mixture into small balls, and dipping them in a smooth candy coating. They’re not just a dessert; they’re a tiny moment of joy, a treat that pairs perfectly with your morning coffee or afternoon pick-me-up. Starbucks offers a variety of flavors, such as chocolate, vanilla, and even seasonal treats like pumpkin spice or peppermint. But when you make these at home, the possibilities are endless.
These cake pops have a unique appeal—they’re fun, colorful, and shareable. Not to mention, they’re the perfect treat for special occasions, parties, or a simple afternoon snack. Making them at home allows you to experiment with flavors and get creative with decorations, giving you total control over your sweet creations.

Ingredients You’ll Need to Make Starbucks Cake Pops
Before we jump into the baking steps, let’s first review the key ingredients you’ll need to gather. The list might look simple, but each ingredient plays an important role in achieving that perfect Starbucks-inspired cake pop.
| Ingredient | Quantity |
| Vanilla or Chocolate Cake | 1 (9-inch cake, store-bought or homemade) |
| Frosting (buttercream or cream cheese) | ½ cup |
| Candy Melts (variety of colors) | 12 oz |
| Lollipop Sticks | 20-25 |
| Sprinkles (optional) | As desired |
Key Ingredients Breakdown:
- Cake: You can use either store-bought cake mix or make a homemade cake. Most cake pop recipes call for vanilla or chocolate, but feel free to experiment with other flavors, like red velvet or lemon. Keep in mind, the cake should be moist and fluffy to ensure your pops aren’t dry.
- Frosting: This acts as the binder for your cake pop mixture. You can use any frosting you prefer, though buttercream and cream cheese are common choices. The goal is to mix enough frosting into the cake crumbs to hold everything together without making it too soggy.
- Candy Melts: These are the magical coating that gives your cake pops that signature smooth, shiny exterior. You can find candy melts in various colors, so feel free to match them to a holiday or theme. Alternatively, you can use chocolate chips, but candy melts give a much better texture and appearance.
- Lollipop Sticks: These sticks are essential to holding your cake pops together. They also add that cute “on-a-stick” aesthetic. You can find cake pop sticks at craft stores or online.
- Sprinkles (Optional): Sprinkles add that extra touch of fun and visual appeal. Choose your favorite colors, or use festive sprinkles to make the cake pops even more special.
Essential Tools for Cake Pop Success
While the ingredients are important, having the right tools can make your cake pop-making experience much easier. Here’s a quick checklist of the tools you’ll need:
- Mixing Bowl: A large mixing bowl to combine your cake and frosting mixture.
- Baking Sheet: To place the cake balls on while they chill before being dipped.
- Parchment Paper: Use parchment paper on your baking sheet to keep the cake balls from sticking.
- Microwave-Safe Bowl or Double Boiler: For melting the candy melts or chocolate coating.
- Styrofoam Block or Cake Pop Stand: This will hold your cake pops upright while they dry, preventing them from getting messy.
- Spoons or Scoop: For portioning out your cake ball mixture and making them uniform in size.
With these tools in hand, you’re ready to start the process of creating your own Starbucks-inspired cake pops!
Step-by-Step Instructions to Make Starbucks Cake Pops
Now, let’s dive into the fun part: making your Starbucks cake pops at home! Follow this simple, step-by-step guide to create perfectly shaped and coated cake pops that will have everyone asking for the recipe.
Step 1: Prepare the Cake Mixture
Start by baking your cake. Whether you use a boxed mix or make it from scratch, the first step is to bake a 9-inch cake. Once it’s done, let it cool completely.
Once cooled, crumble the cake into fine crumbs. You can do this by using your hands or a food processor. The goal is to break the cake down into small, even crumbs. Transfer the crumbs into a large mixing bowl.
Add the frosting. Start by adding a small amount, and mix it into the cake crumbs until the mixture is sticky and holds together. Be careful not to add too much frosting—if the mixture is too wet, your cake pops might fall apart. Aim for a consistency that’s firm but not overly moist.
Step 2: Shape the Cake Balls
Once your cake and frosting mixture is ready, begin rolling it into cake balls. Take a small amount of the mixture and roll it between your hands to form a ball about 1 inch in diameter. Use a spoon or scoop to help keep the portions even.
Once you have enough cake balls, place them on a parchment-lined baking sheet. Place the cake balls in the refrigerator and let them chill for a minimum of 1-2 hours.This step is important because it helps the cake balls firm up and makes them easier to handle when dipping.
Step 3: Melt the Candy Coating
While the cake balls are chilling, it’s time to melt the candy melts. You can do this in a microwave-safe bowl, heating the melts in 30-second intervals and stirring in between. Alternatively, use a double boiler on the stovetop.
If the candy melts are too thick, you can add a small amount of vegetable oil to thin them out. Stir until the coating is smooth and fully melted. At this point, you can divide the melted candy into separate bowls if you’re using multiple colors for your cake pops.
Step 4: Assemble the Cake Pops
Take your chilled cake balls out of the refrigerator. Dip one end of a lollipop stick into the melted candy coating before inserting it into the center of each cake ball. This helps anchor the stick and prevents the cake pop from falling off later.
Allow the candy coating to harden slightly (about 5 minutes) before continuing to dip the entire cake ball.
Step 5: Dip and Decorate
Now, it’s time to dip your cake balls into the melted candy coating. Hold the lollipop stick and dip the cake pop into the melted candy, swirling it around to ensure it’s fully coated. Tap the stick gently to remove any excess candy.
While the coating is still wet, add any decorations you like—sprinkles, edible glitter, or even a drizzle of another color of candy melt. This is where you can get creative and add a personal touch to each pop.
Step 6: Dry and Enjoy!
Once the cake pops are fully coated and decorated, place them in a Styrofoam block or cake pop stand to dry. Allow the coating to set for at least 30 minutes before handling or serving.
When the coating has hardened, your homemade Starbucks cake pops are ready to enjoy! You’ve created a delicious, fun, and visually appealing treat that’s sure to impress.
Pro Tips for Perfect Cake Pops Every Time
Achieving perfect cake pops can be a little tricky, but with these pro tips, you’ll be on your way to creating flawless treats every time.
- Chill the Cake Balls: Don’t skip the chilling step! Cold cake balls hold their shape better and make dipping easier.
- Use a Deep, Narrow Cup for Dipping: This will help you achieve an even coat without drips.
- Thin the Coating: If your candy melts are too thick, add a small amount of vegetable oil to thin them out. This ensures a smooth, shiny finish.
- Roll Cake Balls Evenly: The more uniform the size of the cake balls, the more consistent the final result will be.
Common Mistakes to Avoid
Even seasoned bakers can occasionally run into a few mistakes. Here are a few common pitfalls to avoid when making Starbucks cake pops:
- Overmixing the Cake and Frosting: If you add too much frosting or mix the cake crumbs too much, the cake pops can become dense and heavy. Aim for a light and crumbly texture.
- Skipping the Chilling Step: If the cake balls aren’t chilled enough, they can fall off the stick or lose their shape when dipped.
- Using Regular Chocolate Instead of Candy Melts: While chocolate can work as a coating, candy melts are specifically designed for cake pops and provide a smoother, shinier finish.
FAQ Section: Frequently Asked Questions About Making Starbucks Cake Pops
Q: How long do homemade Starbucks cake pops last?
A: If stored in an airtight container, cake pops can last for up to 5 days at room temperature. Alternatively, you can refrigerate them for up to 2 weeks.
Q: Is it possible to substitute white chocolate for candy melts?
A: Yes, but you’ll need to temper the chocolate to prevent it from becoming too thick or uneven when dipping. Candy melts are specifically formulated for coating cake pops and give better results.
Q: How do I fix cracks in my cake pop coating?
A: Cracks often occur if the cake balls are too cold when dipped. To fix this, allow the cake pops to come to room temperature before dipping, and make sure to apply a thin, even layer of coating.
Conclusion: Bring the Starbucks Experience Home
Making Starbucks cake pops at home is easier than you might think. With the right ingredients, tools, and techniques, you can create these sweet treats in the comfort of your own kitchen. Whether you’re making them for a special event, as a gift, or just for fun, these homemade cake pops are sure to impress. Now that you have all the knowledge to craft your own Starbucks-inspired cake pops, it’s time to get baking!
Ready to make your own Starbucks cake pops? Gather your ingredients, grab your tools, and let’s get started. Don’t forget to share your creations on social media and tag us for a chance to be featured!

